We’ve been testing and using Dlvr.it for several months–and so far, we’ve found that this free tool is great for helping to push content (either yours or someone else’s) to various routes (aka destinations) such as Twitter, LinkedIn, Facebook and more.
How To Set Up Dlvr.it
Setting up Dlvr.it is easy; all you need to get started is an RSS feed of the content you want to share (and a free Dlvr.it account, of course).
Once you’re logged into Dlvr.it, the first thing you want to do is to set up your route(s). For the purposes of this how-to tutorial we’re going to work with Twitter only.
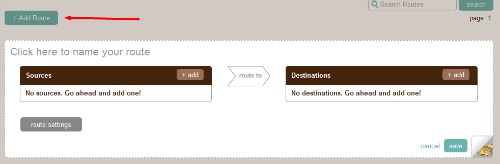
Set up your route by selecting the large blue-green button that reads “add route” at the top of the left hand side of the screen.
A new box will appear asking you to set up the following:
- Name your route (enter whatever tickles your fancy here).
- Add source (add in your desired RSS feed).
- Add destination (Twitter, LinkedIn, Facebook, etc.) — The default settings are best for most users.
You can add as many sources for content as you’d like within a route and all sources you add under a specified route will go to the same destination. Tip: If you want different sources to go to different destinations set up multiple routes.
Adding A Source
When adding a source to Dlvr.it, you’ll see a box with seven tabs. We’ll walk through each of these tabs in this tutorial. The tabs include:
- Feed Details
- Feed Update
- Item Text
- Filters
- Scheduling
- Location
- Advanced
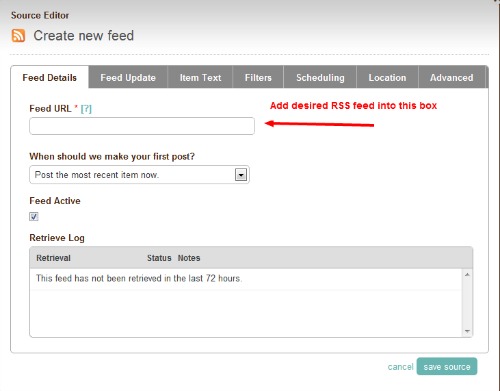
Adding a Source: Feed Details
- Enter the RSS feed URL into the “Feed URL” area.
- Choose from the three available options shown under “When should we make your first post?”
- Note: Be cautious when selecting “All items existing in feed now (up to maximum).” The maximum number, by default, is 10. That number can be changed on the “Feed Update” tab.
- Leave the “Feed Active” box checked
- NOTE: Don’t hit “Save Source” quite yet – we’re going to proceed to edit the other six tabs mentioned above
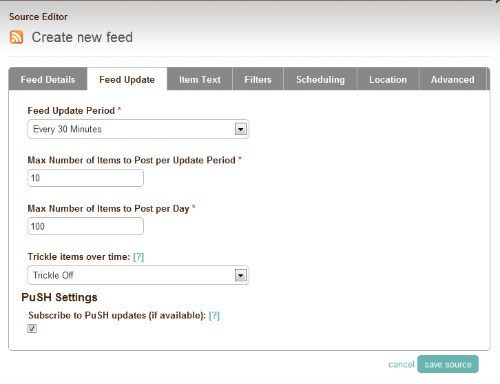
Adding a Source: Feed Update
In the screenshot below you’ll see the tab defaults. Change the following areas however you’d like. If you need ideas, we’ve got details on various configuration options.
- Feed Update Period: This field tells Dlvr.it how often to check the RSS feed for new content. Most blogs aren’t updated quite that frequently but this is the best way to have content distributed within 30 minutes of publication. If the source you’re adding publishes frequently throughout the day (Huffington Post, as an example) and you don’t want all posts hitting your destination route you can change the Feed Update Period to one of the other options.
- Max Number of Items to Post Per Update Period: This is the configuration mentioned earlier under Adding a Source: Feed Details. For most people, changing 10 to 1 is best. Dlvr.it will post this number of posts each time it’s told to check the RSS feed as outlined above under Feed Update Period.
- Max Number of Items to Post Per Day: Figure out what number works best for you.
- Trickle Items Over Time: To fully understand what this feature offers, click the question mark and read each description. If the blog you’re adding posts daily (or less frequently) you may just want to select Post Newest Item first.
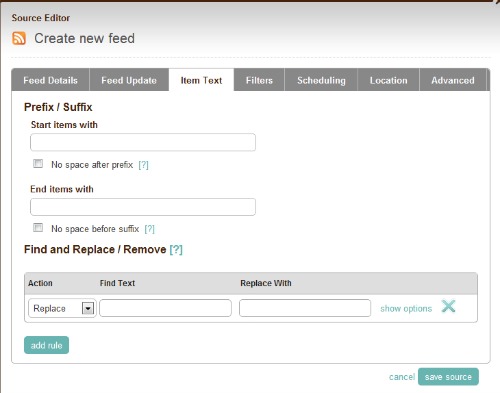
Adding a Source: Item Text
This is where you can get creative with the use of hashtags and source listings. We’ve got a few ideas of terms you can add–just keep in mind the only limitations are the number of characters allowed by Dlvr.it.
- Use “Start Items With” RT @username
- Use “End Items With” a hashtag (NOTE: use caution since not all blogs stay on topic 100% of the time)
- Use “End Items With” via @username
- Remove/Replace – we’ve never actually used this field but it could be used to change words within a blog post title – maybe you’d like all instances of “Facebook” to be replaced with “#Facebook.” You can add multiple rules, too, if needed.
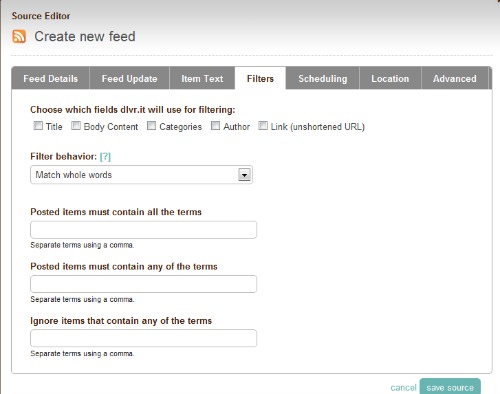
Adding a Source: Filtering
This is another area in which you can get creative with content you include (or exclude) from a specific source. Let’s say your source is a popular tech blog that does reviews and you’re a devoted iPhone user who never wants to auto-publish any content that’s Android-related. Use the Filters tab to set the parameters identifying which words Dlvr.it should search for–and under “Ignore Items that Contain any of the Terms” you could enter “Droid, Android”.
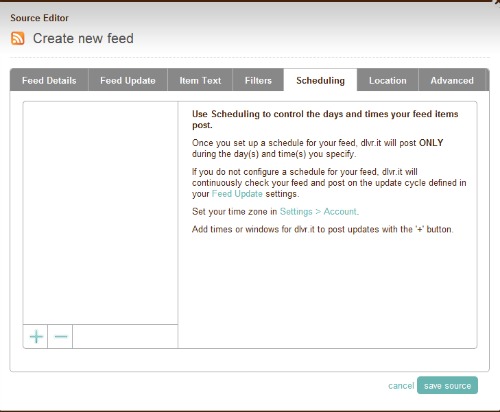
Adding a Source: Scheduling
Only want to post content from your source on specific days of the week? Easy! Be sure you change your timezone under Account Settings before setting up any schedules.
Use of this feature is best explained using the information directly from Dlvr.it’s setup screen. Once you set up a schedule for your feed, Dlvr.it will post ONLY during the day(s) and time(s) you specify.
If you do not configure a schedule for your feed, Dlvr.it will continuously check your feed and post on the update cycle defined in your Feed Update settings.
Adding a Source: Location
This feature is only applicable to those of you who utilize the share location option offered by Twitter. From Dlvr.it’s help screen:
Dlvr.it will pass your feed location info, if available, to Twitter when we post. You’ll need to turn on location in your Twitter account – log into http://twitter.com, and under Settings, make sure the Add a location to your tweets option is checked.
Adding a Source: Advanced
For most users, using Dlvr.it’s defaults is fine. That being said, it’s a good idea to give this tab a good overview in the event you’d like to tweak these settings.
After that? You’re finished! Go ahead and hit Save Source.
Repeat all steps above for each source you want to add to your route. You can have as many sources as you want.

Useful tips:
- If you’re setting up multiple sources, we’d advise not adding them all at one time because Dlvr.it uses the time of your initial set up to determine when it checks the feeds based on your feed update period. Adding multiple sources within a short period of time could unintentionally clutter your stream and leave big time gaps between subsequent updates.
- If you have a large number of sources, you may want a tidier source dashboard. Maybe you’d like to organize this by @username. By default, Dlvr.it will choose the name it finds when it pulls in the RSS feed. If you’d like to change this you can edit it (you can only edit the name after the source has originally been set up and saved) to whatever you’d like, e.g. @ShellyKramer instead of the default RSS Feed Name.
And there you have it–Dlvr.it 101! We did the leg work so you don’t have to–and now you love us even more, right?
If you’re already a Dlvr.it user, we’d love to hear from you. Which features do you like best? What features would make it even better?